Building LittleGPTracker in a Container
LittleGPTracker (affectionately known as ‘The piggy’ tracker) is a minimalist music tracker developed for portable consoles, such as the GamePark GP2X and Sony’s PSP, since 2006. The upsurge in cheap emulation devices from companies like Anbernic, Powkiddy and TrimUI means that in 2025, the piggy is as popular as ever. It is available for those devices via Portmaster, and maintained by djdiskmachine.
Trackers take me back to when I was around 15 trying to make electronic music (read: happy hardcore 🫣) with my old Amiga 600, running Octamed. My musical ability has not progressed, but my fondness for watching hex numbers scroll down the screen and doing something my kids would find esoteric and edgy is ever present. In fact, niche, techy modes of music production are really interesting to me - this is the most recent manifestation of that curiosity!
I’ve got an Anbernic RG35XX H, which I play intermittently, but my PC is generally always on. Having the piggy on the PC would be a solid way to actually take the time to learn how to make music, surely?!
Below is a quick guide to building LittleGPTracker on Linux using a container to segregate the dependencies from those of the OS. It also covers setting up controls, including a joypad.
Pre-requisites
- Some kind of containerisation software (e.g. Docker, Podman)
- A Linux machine with an internet connection
Building
This builds specifically for x64 architectures, but can be easily modified for ARM or 32-bit builds.
Modifying for Raspberry Pi or 32-bit builds
This will just take some tinkering with the Dockerfile and ...-compose.yml files, based off the per-platform build instructions on the LittleGPTracker git repo.
X86: Compile under Linux
This builds a 32bit version of the X64 SDL2 port
Required libs:
sudo dpkg --add-architecture i386 && sudo apt update
sudo apt install -y git make gcc-multilib g++-multilib libsdl2-dev:i386 libasound2-plugins:i386 libjack-dev:i386 python3 python3-pillow
Build with make PLATFORM=X86.
RASPI: Compile under Linux
Required libs:
sudo apt install -y git gcc libsdl1.2-dev make g++ libjack-dev python3 python3-pillow
Build with make.
The dpkg and apt commands need to be integrated into the Dockerfile using RUN directives (see line 7. Remember to remove existing commands so you’re only installing what’s relevant.
The make commands need to be updated in both the Dockerfile (line 28) and the docker-compose.yml/podman-compose.yml (line 15). The 32-bit version expects the PLATFORM=X86 option; whereas the Raspberry Pi version just needs a plain old make.
First, clone the git repo: git clone https://github.com/danpicton/pigbuild, then…
Docker
1docker-compose up --build
Podman
1podman-compose up --build
After the build completes, the compiled binaries and related files will be available in the build-output/ directory on your host machine.
Setup and Running
Controls and Config
There are two settings files config.xml and mapping.xml. These should live in the same directory as the lgpt.x64 binary.
config.xml
This file contains various settings, including key mappings:
 1<CONFIG>
 2    <KEY_A value="z" />
 3    <KEY_B value="x" />
 4    <KEY_LEFT value="left" />
 5    <KEY_RIGHT value="right" />
 6    <KEY_UP value="up" />
 7    <KEY_DOWN value="down" />
 8    <KEY_LSHOULDER value="\" />
 9    <KEY_RSHOULDER value="c" />
10    <KEY_START value="space" />
11    <ROOTFOLDER value="/home/myuser/soundsamples"/>
12    <SAMPLELIB value="/home/myuser/soundsamples"/>
13</CONFIG>
mapping.xml
This is used exclusively for mapping joypad buttons to actions. The following maps a PS4 pad:
 1<MAPPINGS>
 2    <MAP src="hat:0:0:0" dst="/event/up" />
 3    <MAP src="hat:0:0:2" dst="/event/down" />
 4    <MAP src="hat:0:0:3" dst="/event/left" />
 5    <MAP src="hat:0:0:1" dst="/event/right" />
 6    <MAP src="but:0:0" dst="/event/a" />
 7    <MAP src="but:0:1" dst="/event/b" />
 8    <MAP src="but:0:3" dst="/event/a" />
 9    <MAP src="but:0:2" dst="/event/b" />
10    <MAP src="but:0:4" dst="/event/lshoulder" />
11    <MAP src="but:0:5" dst="/event/rshoulder" />
12    <MAP src="but:0:9" dst="/event/start" />
13    <MAP src="but:0:8" dst="/tempo/tap" />
14</MAPPINGS>
Correct mappings can be gleaned easily my running the program using ./lgpt.x64 -DUMPEVENT=YES.
Running
Running the program is as simple as ./lgpt.x64 (suffix will vary based on architecture), but on a normal monitor, the piggy is a bit pokey:
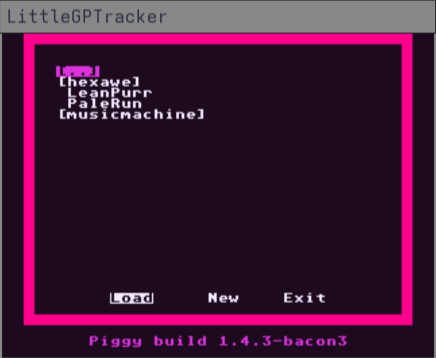
That renders a little larger in the page than the actual window does, but you can see it’s a little small for an actual monitor, rather than a 3.5" handheld screen!
Running with ./lgpt.x64 -SCREENMULT=4 increases the size by 4x, which is easily viewable by most.